Monday, December 30, 2013

Recipe Dish Towels

We don't often put pen to paper anymore, but there is something so special about a handwritten card, letter, or note.  Take a recipe for instance. How often to you actually write down a recipe when it is so easy to print it off online, take a picture with your phone, or run it through the copy machine?

When looking through my parents' recipe box, most are in my Grandma's handwriting, copied or passed down.  Many of my childhood memories of my dad's mom are of her in the kitchen, and although we lost our dear Grandma J just short of two years ago, she is always present in the meals the Jorgensen family prepares throughout the year.  Her bread stuffing at Thanksgiving, pancakes on a Sunday morning, and her homemade noodles on that special occasion when my mom has a few days to dedicate to the extensive process.

When I came across a project idea on Pinterest to preserve a few of my grandmother's recipes on dish towels, I could not pass up the opportunity to make this special keepsake for each household in the Jorgensen family for Christmas.


Here is how I did it:

Step 1: Pick the recipes - my sister and cousins Beau and Ashley helped me with this one. We decided on Grandma's stuffing and noodles.


Step 2: Take a high quality picture of each recipe.

Step 3: Using an editing program (we used Photoshop) create a 34" by 54" canvas - the size of 1 yard of fabric.  Then, insert your recipes onto the canvas.  We choose to put 4 of them on a yard.  Be sure to account for your seam - we left 2 inches of fabric on each side of each recipe.  Then, to add a little character, we made the background of the canvas a dark brown. Thanks to by husband, Rob (aka - my personal graphic designer), for taking care of this step!

Step 4: Upload your design to a custom fabric website.  The tutorial for this project that I followed used Spoonflower.  I had not heard of this company before, but I have a feeling we will be working on a lot of projects together in the future :)

Step 5: Select your fabric and order.  We choose linen and selected the '1 yard' option (the size of our design).  To make enough for all of my family, I ordered 4 yards - to become 16 towels.

Step 6: Wait......plan ahead for when you need your fabric by - it took about 2.5 weeks for mine to come in, although it was the holiday season.

Step 7: Scream on the phone with excitement when your husband calls to tell you it has been delivered. OK, so you don't have to do this, but I couldn't wait to see it!


Step 8: Cut each recipe from your fabric, keeping in mind the extra fabric you will need for your seam!


Step 9: Use an iron to create a sharp fold for your seam


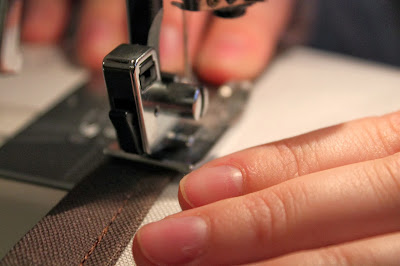
Step 10: Sew


 Step 11: Use some of your scraps for a holder on the back if you plan to hang them on a hook.


Step 11: Admire!

There is so much history in a recipe and so many stories so share about the person who wrote them. I love that I will be reminded of my grandma everyday in my kitchen.


Christmas

We had a very merry Christmas this year! Here are some highlights...

"Festive footwear" with the Smiths in Des Moines...


Time with my family in Gurnee and the Jorgensens in Hampton...


and the Klein and Miller celebrations in Cedar Rapids...


The annual nativity story - this year featuring the newest baby Jesus of the family, Alice.


A Reindeer at SCHEELS

One of my favorite events to date at SCHEELS......a real reindeer in the store!


There are many opportunities to meet Santa throughout the holiday season in the Cedar Valley.....at one of the malls, Holiday Hoopla, at the Christmas tree farm.....but how often to kiddos get the chance to meet one of the famous reindeer?


I started plans for this event in June and couldn't be happier with how well it went.  On a Tuesday night in December, little ones crawled into Santa's sleigh for a free picture, told him their last minute Christmas wishes, and then visited with a reindeer. 

Cruz right before he told Santa "Alright, I'd like to get down now"

While waiting in line, they could write a letter to Santa, pick out a pair of antlers, and learn some facts about reindeer.


Apart from having to crank up the roasted nuts in our coffee shop to mask the smell of our furry friend, and holding a shopping bag for a young girl as she got sick on our run to the bathroom, I'd say it was a huge success! Around 300 children joined in on the fun!


Tuesday, December 17, 2013

Lace Boot Socks


This past year could be dubbed 'Year of the Boot Socks' in the Midwest and I am guilty of hopping on the train.  Problem is, some of my boots are too tight to fit the bulky material. So, I decided to make a thinner pair for myself with some extra lace I had stored away from an old project.

Step 1: Wrap the lace around your calf to determine the width of your fabric. For the length, I went with about 6 inches.


Step2: Sew the two sides together to create a tube.


Step 3: Turn inside out so the hem is on the inside and slip on!


Should work with boots of all colors! If I come across some cute buttons I may add them as well for a small accent.

Sunday, December 15, 2013

Miracle on 34th Street

The classic story of a department store Santa who claims to be the real thing.

Rob and I joined a group of family and friends for a night at Theatre Cedar Rapids for Miracle on 34th Street to benefit Big Brothers Big Sisters of Cedar Rapids and East Central Iowa.

I couldn't help but laugh to myself as I realized how my job mirrors character Doris Walker's, event director for Macy's. I'm only days away from welcoming Santa to SCHEELS after researching just the right one back in June (yes, you have to make arrangements that far in advance).  He has to be authentic, preferably have real whiskers, and have a "ho ho ho" for the books.

Kris Kringle's performance stole the show and made even this girl, one who questioned Santa even when I was a little, believe in good ol' Saint Nicholas.

So glad my good friend, old roommate, and bridesmaid Allie could join us! We don't get to see each other near enough!


Saturday, December 14, 2013

NewBo

I’ve been so intrigued by the NewBo City Market in Cedar Rapids since its opening in October 2012.  I finally found the time to enjoy it with my mother-in-law, Dana, and sister-in-law, Michele, on a December Saturday.

NewBo is situated downtown in one of the 2008 flood-devastated neighborhoods. Five years later, it is now the home of foodies, merchants, and crafters.  The atmosphere was absolutely electric while shoppers sought out unique holiday gifts for their loved ones, sampled ‘That Salsa Guy’s’ dips, smelled the lavender trees, and refueled on matchless delicacies.  I sunk my teeth into a caramelized onion and blue cheese pizza and may or may not have stopped by again the following day for another serving :)  

There are anchor merchants each week, but with the always interchanging guest vendors, I’ll have a reason to revisit again and again!


Thursday, December 12, 2013

Our First Place Ornament

I am the Event Coordinator at our area SCHEELS and recently hosted a free Kids Klub event for customers where we made ornaments to take home and hang on their Christmas tree. 

It was so cute to see all the kiddos working on their ornaments that I was inspired to make my own when I got home that night. I decided on an 'Our 1st Place' ornament made completely out of materials I already had laying around the house.

Step 1: Combine flour, salt, and water in a mixing bowl.  Knead until you form a dough.


Step 2: Roll out the dough and use a cookie cutter (or bowl as I did) to cut a circle.


Step 3: Press your house key into the dough.


Step 4: Use a straw to punch a hole for your hanger.


Step 5: Bake at 300 degrees for about 20 minutes, or until golden brown.


Step 6: Once cooled, put on a coat of paint (optional).


 Step 7: String a ribbon for the hanger.


Step 8: Using a sharpie, write your address.


Step 9: Hang on your tree and enjoy!