Thursday, January 30, 2014

Nightstand Makeover


I had some fun with an old nightstand the other day. I didn't really need the drawer space, and was looking to add a little more character to the piece. 

The Steps: 


1. Remove the bottom drawer and the drawer tracks.


2. If you have a base piece on your nightstand, great! If it doesn't (like mine) cut a piece of wood to fit. Since I don't plan to put anything too heavy on mine (and because I don't have access to a table saw), I opted to use some heavy foam presentation board.


3. Purchase self adhesive shelf liner and apply it to the area you want to cover. I was able to score 2 rolls on Amazon for $10 and only used half of one roll for this project.


4. Add whatever decor you wish.  For now, I have the table numbers from my wedding to represent our wedding date.  I think it would be nice to put a small flower arrangement here too.


    A simple furniture makeover idea for just dollars. And the good news is that if I want to use the drawer again, all I would have to do is remove the foam board piece and reattach the drawer tracks!

    Tuesday, January 28, 2014

    Tiny Tip: Salt Stain Remover

    With all of this nasty weather lately, you probably have salt stains on your boots.  There is a super easy fix for this. 
     
    To clean salt stains from your unfinished (does not have a glossy, protective seal) leather boots: mix vinegar and cold water, spray or dab on, run a damp cloth with cold water over the area, and then allow to air dry.
     
    Good as new!


    Sunday, January 26, 2014

    Hypnosis

    This past Friday night a few friends joined Rob and I at a annual fundraiser for the Boys & Girls Club of the Cedar Valley - That Joker's Thing.  It's a night of auction items, a few awards, and entertainment at Joker's nightclub in Cedar Falls.  This year's headliner was a comedian/hypnotist, and Rob and I volunteered as guinea pigs.
     
    As with most hypnotist shows, only about half of the participants fell under the hosts "spell."  Rob left the stage after he was distracted by me falling onto his shoulder, but I became one of the spectacles for the hour.
     
    I did not react as strongly to some of the situations as others on the stage, but I did hysterically cry when the host told me that I had just run over a kitty with my car, and practically fell off my chair (with my legs spread further apart than I would have liked in front of some area business leaders) as I relaxed on the beach.
     
    We had a great time. I have attended and organized many events like this before, but have never been part of the action.  I was a little nervous that I would make a complete fool of myself, but was pleasantly surprised. Everyone in attendance was just there to have a good laugh and it was a blast to be a part of it. 


    Friday, January 24, 2014

    Recipe: Apple-Honey Drumsticks

    Paired with a Spinach Pomegranate Salad

    What you'll need:
    • Skin-on drumsticks
    • Salt & Pepper
    • 2 cups apple juice
    • 1/2 cup apple cider vinegar
    • 1/4 cup soy sauce
    • 2 teaspoons honey
    • Grated zest of 1 lemon
    • 2 teaspoons sesame seeds
    • 1 tablespoon butter

    What you'll do:

    Season drumsticks with salt and pepper. Bake drumsticks for 30 minutes at 450 degrees, flip, and bake for around another 30 minutes.

    Meanwhile, make your sauce: Bring the apple juice, vinegar, soy sauce, and honey lemon zest to a high simmer in a large skillet over medium-high heat.  Cook until the sauce is syrupy - about 20 minutes - and remove. Add sesame seeds.

    Transfer chicken, sauce and butter to a large bowl. Toss to coat.

    Enjoy!

    Wednesday, January 22, 2014

    Book Review: Mistress

    Author(s): James Patterson and David Ellis
    My Rating: 3.5/5

    Murder can be made to look like suicide; suicide can be made to look like murder…

    I’m a big fan of Mr. Patterson’s work, so I was really looking forward to Mistress.  It didn't end up being one of my favorites, but it is a thriller with twists that kept me guessing. 

    The story follows more-than-a-little paranoid and wealthy online newspaper owner/journalist, Ben Casper.  Just pages into the book Ben watches his friend, Diana Hotchkiss, fall to her death from her apartment balcony.

    With the details of Diana’s death kept under wraps, Ben vows to hunt down the truth behind his friend’s brutal ending. This begins a series of events in which Ben himself becomes the target, and uncovers details of Diana’s life that has him question how well he really knew her.

    The reader is thrown into Ben’s sporadic mind - constantly interrupted with rambling thoughts and presidential history trivia.  What was at first a fascinating mind to witness, did tend to become overwhelming at times.

    A book I recommend for a mystery-lover looking for an easy read.

    Monday, January 20, 2014

    Baby Bouquets

    
    Both sides of my family were blessed with adorable additions over the past two weeks.  My cousin Beau and his wife, Ashley, welcomed second child, Mila.  Also, another cousin, Ben and his wife, Randi, brought home their first bundle of joy, Logan.
     
    Sharing a town with Beau and Ashley provided me the awesome opportunity to visit in the hospital, and drive their son, Cruz, to meet his little sister.  I will always cherish the memories of that car ride, hearing him squeal with excitement to meet her.
     
    We also had the chance to meet baby Logan after a quick drive to Des Monies.  He is the absolute sweetest and melted our hearts with a full head of hair and his grunts :)


    I made baby bouquets for the new mommies (and babies).  More useful than flowers, and a little more my crafty style. Scrapbook paper, tissue paper, gift ribbon, burp blankets, and bibs combine to make these adorable newborn gifts.


    Saturday, January 18, 2014

    Tiny Tip: Boot Inserts from Swim Noodles

    I love when an object can take on a completely different use than its intended purpose.  I found this clever tip online and just had to share. Are you a boot lover frustrated with the disorganized pile of shoes on the floor of your closet like me? Here is a brilliant and ridiculously cheap solution - boot shaper inserts made out of swimming noodles!

    Just buy ($2/noodle), cut, and insert! Each noodle can make four inserts.

    Its so simple it is silly not to do! 


    Thursday, January 9, 2014

    30 Before 30


    My name is Jillian Miller and I am a compulsive list maker. I’m serious, I graduated with a degree in Psychology….and diagnosed myself here. J
    There is something about striking a line through a task that is so rewarding – sometimes more satisfying than completing the task itself.  The Notes app on my phone is filled with lists for groceries, items to buy on my next trip to the craft store, books to read – things that I think of when a pen and paper aren’t handy. At work, my desk and the perimeter of my computer screen are full of Post-it notes. It isn’t unusual to catch me writing a list of what to accomplish over the weekend (including lines to eat lunch and shower), or adding something to my list that I have already done just to cross it off.
    I am not the only one with this obsession and know many female friends who have the same urge (must not be a "man" thing). Now, although my lists keep me organized, what I am drawing my pen over is generally pretty menial and doesn’t hold many accomplishments or memories.
    So, I am jumping on the bandwagon that many writers in the blogosphere are already on, putting these skills to good use, and making my 30 Before 30 goals. I’m a twenty-something gal who is ready to tackle goals that take years rather than a week.
    Looking to make the next few years an adventure, here is my 30 Before 30 (in no particular order):


    To stay updated on my progress, check out the 30 Before 30 tab at the top of this blog! 

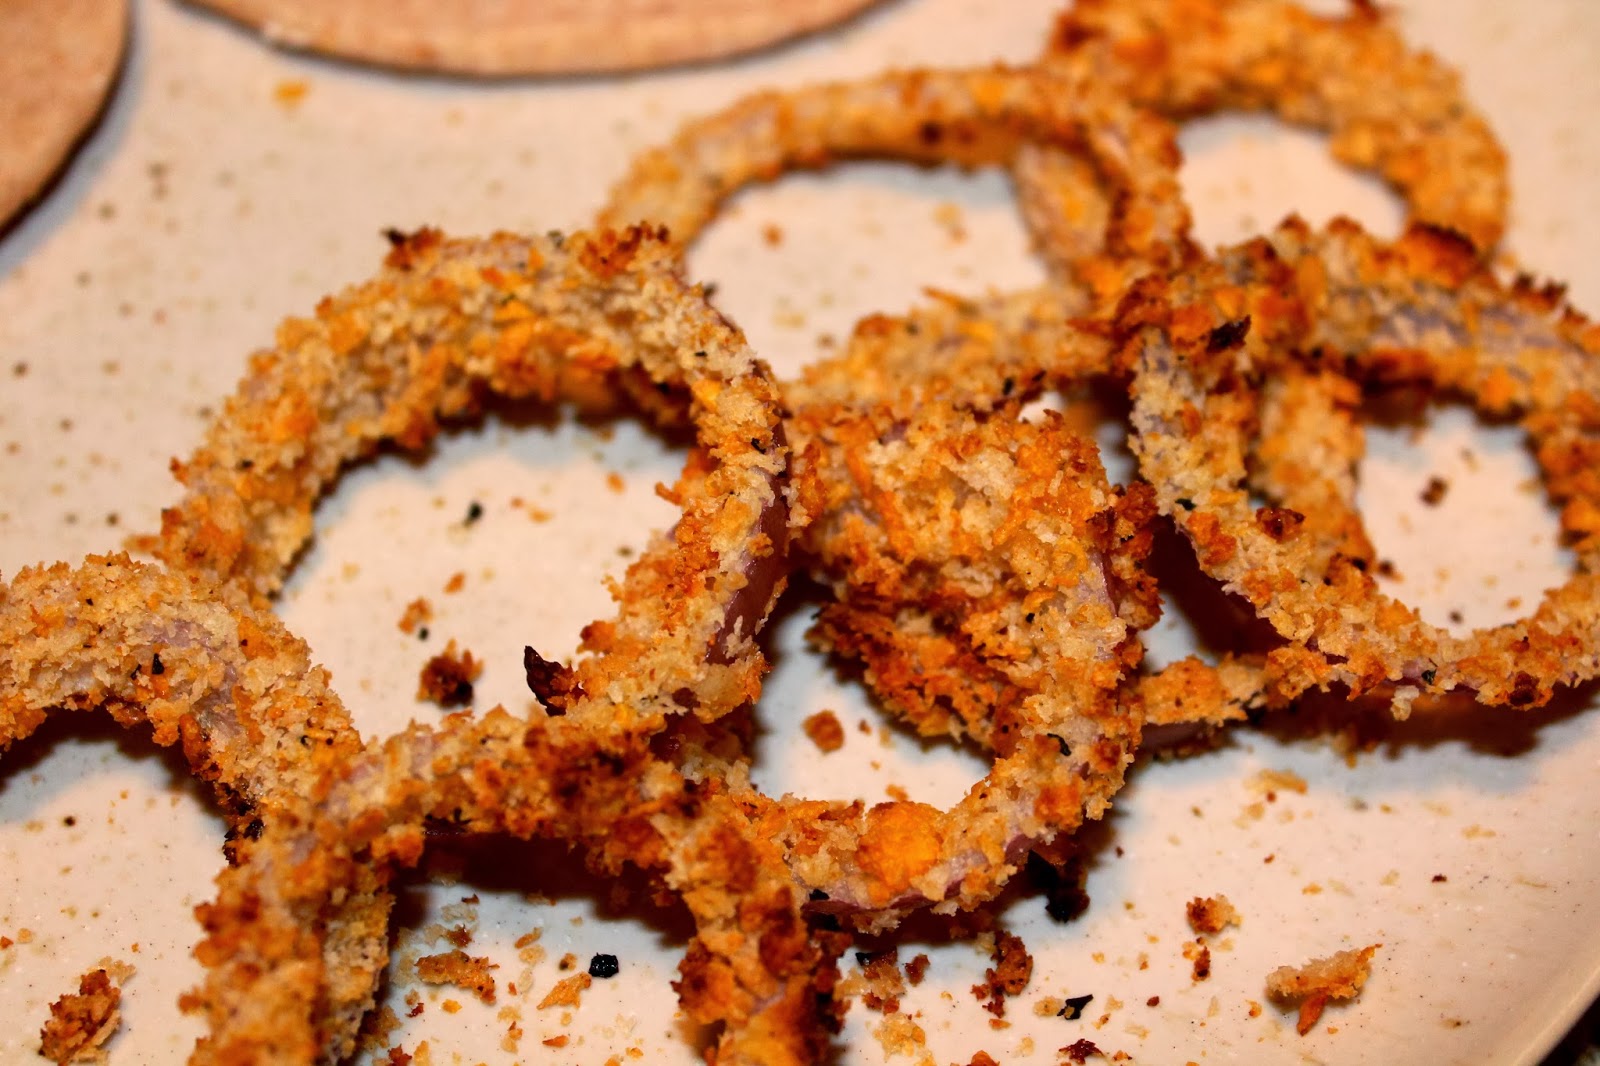
    Recipe: Low Fat Baked Onion Rings

    It's safe to say that those who know me would not call me a 'health nut' or 'fitness guru.' Now I am not eating a pint of ice cream every night either, but I have quite a few more trips to the gym and calories to cut before my name changes from Jillian Miller to Jillian Michaels.  However, a new year brings new possibilities and I hope to become the healthiest me I've been in years in 2014.

    In the spirit of eating healthy, here is a delicious twist on a popular side that my friend Danielle (an actual health guru) introduced me to a few months ago and I found again on Skinny Taste - Low Fat Baked Onion Rings.  

    Ingredients:
    • 1 onion
    • 2 1/4 cups low fat buttermilk
    • 1/2 cup panko bread crumbs
    • 1/4 cup Italian seasoned whole wheat break crumbs
    • 1/4 cup crushed corn flakes

    The Steps:

    1. Slice your onion into rings and soak in buttermilk.  The recipe calls for them to soak for a few hours, but I was only patient enough for 20 minutes and they still turned out great.


    2. Combine panko, bread crumbs and corn flakes into a dish.  Leave some of your mixture in another dish so you have fresh crumbs when your mixture starts to clump and has a hard time sticking to the onions. 


    3. Coat each soaked ring in your crumb mixture and place onto a baking sheet lined with foil or parchment paper.  Tip - it is best to use a fork to lift your onion out of the crumbles (your fingers will knock some of the crumbles off)


    4. Bake in oven at 450 degrees for 10-12 minutes and enjoy! They paired perfectly with my turkey burger!


    Wednesday, January 8, 2014

    DIY Headboard

    I've been itching to add a little character to our master and guest bedrooms, but as a renter it can be very difficult to do so without the ability to paint the walls or the budget to buy new furniture. So, after some brainstorming I came up with a DIY headboard for under $40/each - maybe even less depending on what supplies you already have around the house.  Check it out! 

    Our Master Bedroom
    Our Guest Bedroom
    What you'll need:

    • Foam poster board
    • Batting
    • Fabric
    • Staple gun
    • Tape
    • Box cutter
    • Decorative trim, buttons, etc.

    What you'll do:

    Step 1: Purchase foam tri-fold presentation board from your local craft store.  Be sure to measure the width of your bed before you leave the house to know how many inches you will need (king bed = around 80 inches, queen bed= around 60 inches).  I was able to make both headboards from 3 of these presentation boards.


    Step 2: Tape the folds of the board and add additional sections (if needed) for width.


    Step 3: If you would like a custom shape to your headboard (as I did for our master bedroom) use a box cutter. Then, use the piece you cut off to trace a mirror of the design on the opposite side.


    Step 4: Add two layers of batting, pull your fabric tight, and secure with a staple gun.


    You are halfway there! 


    Step 5: This is the step that my headboards went in different directions.  For my master headboard, I simply used straight pins to secure a decorative trim near the edge.


    And for the guest room headboard, I strung a button onto the straight pin, poked through the headboard, bent the ends down on the back, and secured with tape.


    Almost done!


    Step 6: Secure to the wall with one nail on each side. For the master, I hide the nails under the trim. For the guest headboard, I took advantage of my button decor and hot glued my two remaining buttons over the nails.


    Step 7: Admire your updated space!


    Before
    After! 
    No need to spend money on something like this when you could make your own inexpensively at home! Each one took about an hour and cost under $40 - DO IT!